
Sealant can feel like the ultimate quick fix: find the drip, apply a bead, let it cure, and move on. Sometimes that works temporarily. But if you’ve ever “fixed” a gutter leak only to see it return after the next big storm or season change, you’ve experienced the real issue: sealant doesn’t usually fail all at once. It fails gradually, for predictable reasons. Understanding why helps you prevent repeat leaks and stop chasing the same problem year after year.
Here are eight common reasons gutter sealant fails over time, and what to do instead if you want the repair to last.
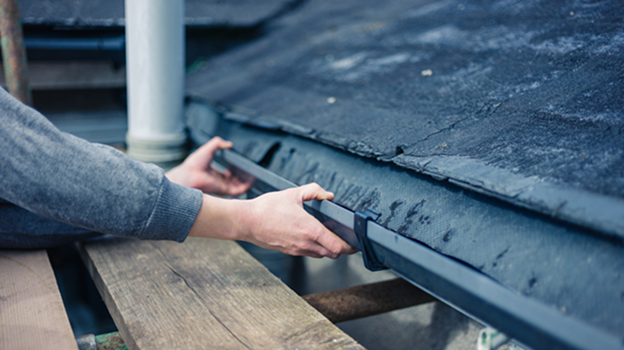
The Surface Wasn’t Clean (Dirt, Oxidation, and Old Caulk Break Adhesion)
Sealant bonds best to clean, bare, dry material. Gutters, however, collect pollen, shingle grit, oily residue, and microscopic dust. Even if the area looks clean, oxidation on metal or leftover caulk can keep new sealant from truly grabbing the surface.
How to prevent it: Thoroughly clean and de-grease the area, remove old sealant completely, and lightly abrade oxidized metal (where appropriate) so the new bead has a solid surface to adhere to.
The Area Was Still Damp (Moisture Trapped Under the Bead)
Water is the enemy of adhesion. If you seal a joint while it’s damp (or if water is still weeping from behind the seam), moisture can get trapped and prevent proper bonding. This often creates a seal that looks fine at first but peels or bubbles later.
How to prevent it: Dry the area fully and confirm there’s no ongoing seepage. If water keeps appearing, the leak may be coming from above the seam (pitch issues, backups, or fascia problems), not the seam itself.
Temperature Swings Cause Expansion and Contraction
Gutters expand in heat and contract in cold. That movement stresses joints, corners, and end caps. Over time, even high-quality sealant can crack if it’s applied too thin, placed where movement is constant, or paired with a poorly supported gutter run that flexes more than it should.
How to prevent it: Ensure the gutter is properly supported (hangers/brackets at correct spacing) and apply sealant in a way that allows flexibility. Think of sealing as part of a system, not a standalone “patch.”
UV Exposure Breaks Down Many Sealants
Sunlight is harsh. Some sealants degrade faster when exposed to UV, especially if they’re not specifically designed for prolonged outdoor use. The bead may harden, shrink, or become brittle, leading to hairline cracks that leak under heavy flow.
How to prevent it: Use a sealant rated for exterior/UV exposure and apply it in the correct location. In some cases, sealing from the inside of the gutter (where it’s less exposed) can extend the lifespan—if the joint is accessible and properly prepped.
Standing Water and Debris Create Constant Stress
If water sits in the gutter because of poor pitch or a partial clog, it applies pressure to seams for longer periods. Debris piles also hold moisture against the metal, accelerating corrosion and undermining the sealed area. This is a big reason “the same seam” keeps failing.
How to prevent it: Fix the reason water is lingering; adjust pitch, clear downspouts, remove debris, and address any low spots. Sealant lasts longer when it’s not constantly submerged or pressed by backed-up water.
Movement at the Joint (Loose Fasteners or Flexing Sections)
If hangers are loose or the fascia board behind the gutter is soft, the gutter can shift slightly during storms. Even subtle movement can pull a seam apart and stress the bead. A perfect seal applied to a moving joint is still a temporary seal.
How to prevent it: Tighten/replace fasteners, add hangers where support is lacking, and repair compromised fascia if needed. Stabilize first, then seal.
The Wrong Product Was Used (Or Mixed Products Were Layered)
Not all “caulk” is created equal. Some products shrink, some don’t adhere well to metal, and some aren’t meant for constant water exposure. Also, layering different types of sealant can create compatibility issues where the new bead never bonds to the old layer.
How to prevent it: Use gutter-appropriate sealant and avoid “mystery layers.” Remove old product fully rather than sealing over questionable material. If you’re unsure what was used before, full removal is usually the safest path.
The Leak Was Misdiagnosed (Sealing the Symptom, Not the Source)
This is the sneakiest one: you seal the spot where water appears, but the source is somewhere else, like an overflowing low spot, a blocked downspout, a separated end cap, or water running behind the gutter from the roof edge. The “repair” fails because the system is still forcing water into the same vulnerable area.
How to prevent it: Diagnose during rainfall or with controlled water testing. Track water flow from the roof to the downspout. If the leak only happens during heavy rain, the issue is often capacity, pitch, or drainage – not just a gap in a seam.
Sealant can be part of a durable solution, but the most reliable fixes combine good prep, correct materials, and system-level corrections (support, slope, drainage). If leaks keep coming back, it may be time to consider expert gutter leak sealing, not because you can’t apply a bead, but because repeat failures usually point to underlying alignment or drainage issues that need more than a quick patch.